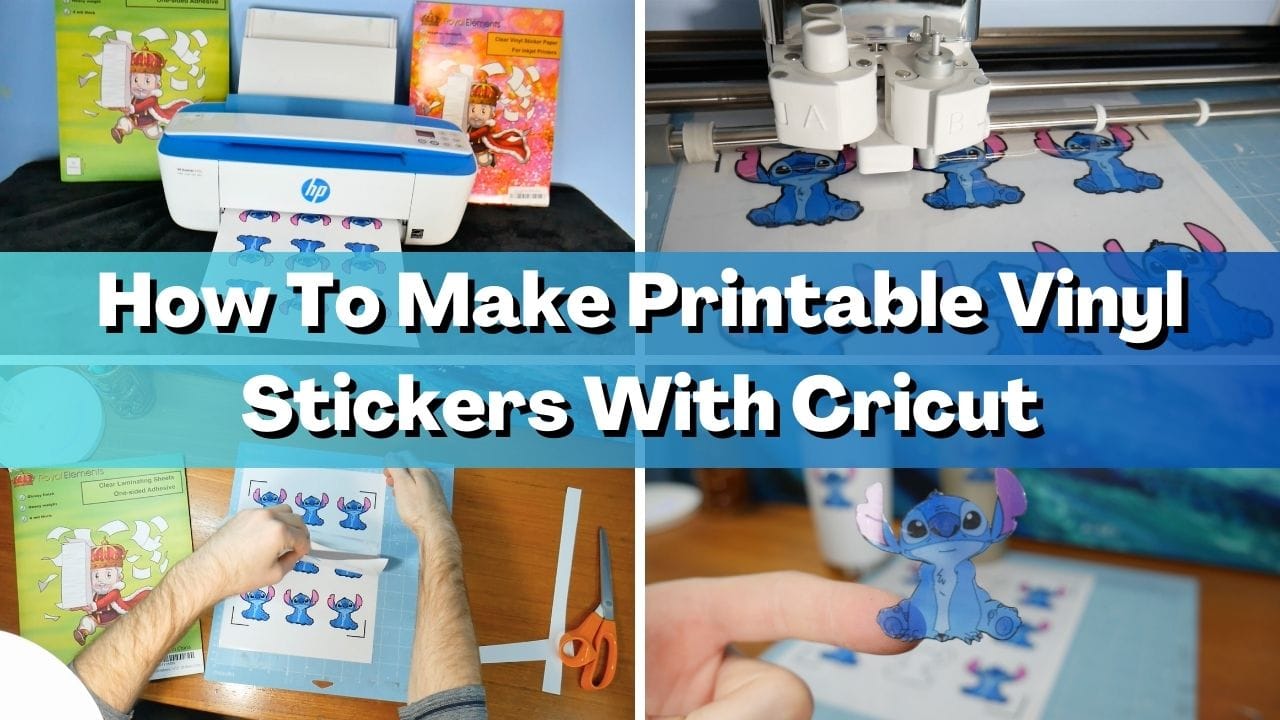
Creating your own printable vinyl stickers with a Cricut cutting machine is a fun and rewarding way to personalize items, decorate, or even start a small business.
With just a few supplies and a bit of creativity, you can design stickers that are professional-looking and unique.
Follow this step-by-step guide to get started!
What You’ll Need
To make printable vinyl stickers, you’ll need:
Cricut Machine (Cricut Explore Air 2, Cricut Maker, or Cricut Joy)
Printable Vinyl Sheets (compatible with inkjet or laser printers, like Royal Elements Printable Vinyl)
Laminating Sheets (optional for extra durability)
Inkjet or Laser Printer
StandardGrip Cricut Mat
Weeding Tools (optional but helpful)
Scissors (optional for trimming excess material)
Make sure to gather all your supplies before you start to ensure a smooth and enjoyable crafting process.

Step 1: Design Your Stickers
The first step in creating printable vinyl stickers is designing your artwork. This is where you can let your creativity shine!
Open Cricut Design Space: Launch the software and create a new project. Cricut Design Space is user-friendly and allows you to import your own designs or use its built-in tools.
Upload Your Designs: If you already have pre-made designs, upload them into Design Space. Ensure your files are in a compatible format such as PNG, JPEG, or SVG. For more detailed designs, SVG files work best as they retain crisp, clean lines.
Create Custom Designs: If you’re feeling creative, you can design your own stickers using software like Canva or Procreate. Export your designs and upload them to Design Space.
Adjust Dimensions: Size your stickers according to your needs. A standard size is between 2” to 4”, but Cricut’s print-then-cut feature allows up to 6.75” x 9.25” per sheet.
Flatten Your Images: If your designs include multiple layers, use the “Flatten” tool in Design Space to ensure Cricut recognizes them as a single printable image.
Spend some time perfecting your designs. This step sets the foundation for beautiful stickers.

Step 2: Print Your Design
Once your designs are ready, it’s time to print them onto your vinyl sheets.
Load Your Printable Vinyl: Insert a sheet of printable vinyl into your printer, ensuring it’s loaded correctly (check that the printable side is facing up or down, depending on your printer).
Check Printer Settings: In Cricut Design Space, click “Make It” and select “Send to Printer.” Adjust your printer settings for the best results. Use high-quality mode and select the appropriate paper type, such as “Glossy” or “Photo Paper.”
Print: Print your designs. Be patient and allow the ink to dry completely before moving to the next step. This usually takes about 10-15 minutes.
Printing is a crucial step where quality materials and proper settings make a big difference. If you’re unsure about your printer’s capabilities, test on a regular sheet of paper first.
Step 3: (Optional) Laminate Your Stickers
Adding a layer of laminate to your stickers provides extra protection, making them waterproof and more durable.
This step is especially useful if your stickers will be used on items exposed to water or frequent handling, such as water bottles or laptops.
Cut Laminating Sheet: Trim the laminating sheet to fit over your printed designs. Leave a small border around the edges for easier alignment.
Apply Laminate: Slowly peel back one edge of the laminating sheet and stick it to the vinyl. Use a scraper or a credit card to smooth it out as you go. This helps to eliminate air bubbles and ensures a flawless finish.
While optional, laminating adds a professional touch to your stickers, enhancing their durability and aesthetic appeal.

Step 4: Cut Your Stickers with Cricut
Now it’s time to cut your stickers with precision using your Cricut machine.
Place on Cricut Mat: Position the laminated vinyl sheet (or plain printed sheet) on your StandardGrip Cricut mat. Make sure the sheet is aligned properly with the grid lines.
Select Material Setting: In Cricut Design Space, choose the correct material setting based on your project. For printable vinyl, select “Printable Vinyl” or “Sticker Paper.” If laminated, adjust the pressure slightly higher for accurate cuts.
Calibrate Print-Then-Cut (First-Time Users): If this is your first time using the print-then-cut feature, follow the on-screen instructions to calibrate your Cricut machine. This ensures precise cuts around your designs.
Cut Stickers: Load the mat into the machine and press “Go.” The Cricut will scan the black registration marks and cut around each design with precision.
Take your time during this step to avoid mistakes. If needed, run a small test cut first.
Step 5: Weed and Peel
After cutting, it’s time to weed and peel your stickers.
Remove Excess Vinyl: Carefully peel away the excess vinyl around your designs. Use weeding tools to remove any small unwanted pieces.
Peel Stickers: Gently lift your stickers off the mat. If they’re sticking too much, use a scraper tool to help lift them without damaging the edges.
This step can be satisfying as you reveal the final product of your hard
Step 6: Apply Your Stickers
Your stickers are now ready to use! Stick them on notebooks, laptops, water bottles, or any smooth surface. If laminated, they’ll be waterproof and resistant to wear and tear, making them perfect for a variety of uses.

Pro Tips for Success
Here are some tips to ensure your project goes smoothly:
Use High-Quality Vinyl: Opt for premium vinyl sheets like Royal Elements Printable Vinyl for vibrant colors and excellent durability.
Avoid Smudges: Allow printed sheets to dry for at least 15 minutes before handling.
Test Cut Settings: Run a small test cut to ensure your Cricut settings are accurate, especially if you’re using laminate.
Keep Materials Clean: Dust or debris on your mat or vinyl can affect the cutting quality. Clean your Cricut mat regularly for the best results.
Store Stickers Properly: Keep finished stickers in a cool, dry place to maintain their quality.
Why Choose Printable Vinyl Stickers?
Printable vinyl stickers are incredibly versatile and can be used for:
Personal Projects: Decorate water bottles, notebooks, or phone cases.
Small Businesses: Sell custom stickers on platforms like Etsy or your own website.
Events and Gifting: Create personalized party favors, labels, or gifts.
Marketing: Use them for branding and promotional purposes.
Creating printable vinyl stickers with a Cricut is a simple yet creative process.
Whether for personal use or a small business, this DIY project allows you to bring your designs to life.
Ready to start? Check out Royal Elements’ premium printable vinyl to elevate your sticker-making game!


