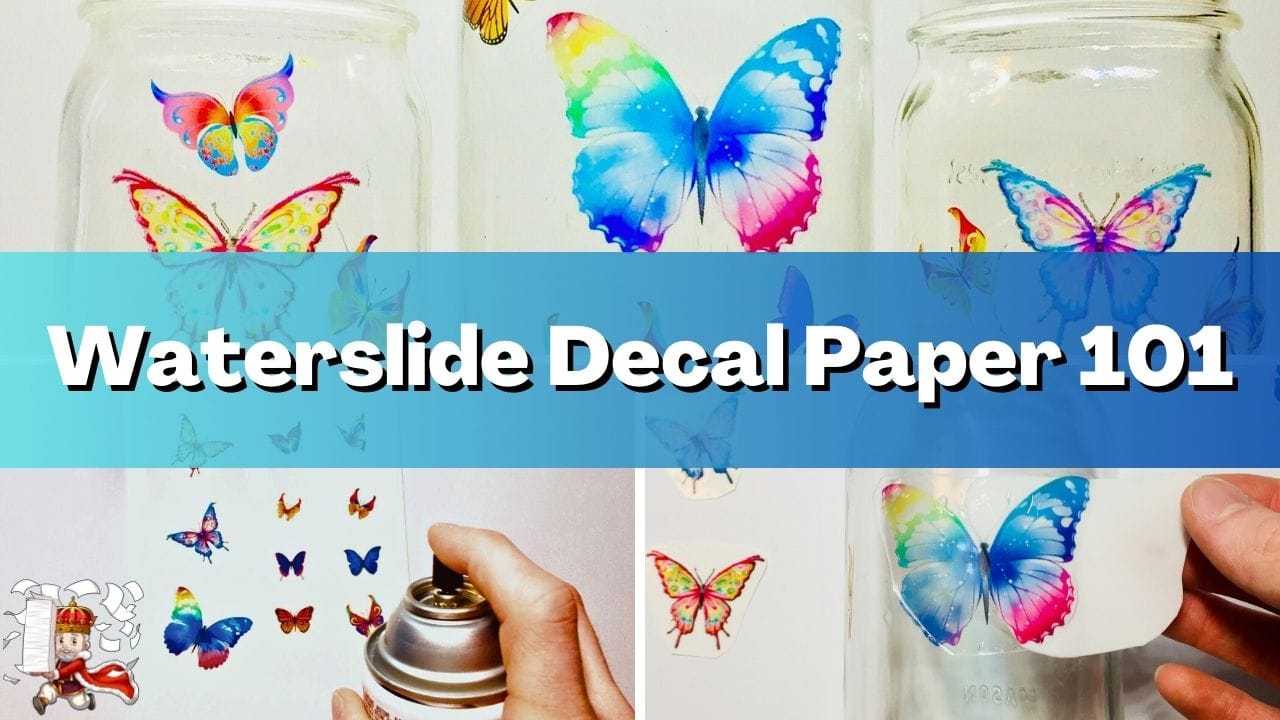
Waterslide decal paper is a fantastic tool for crafting custom designs on a variety of surfaces, including ceramics, glass, wood, and metal.
Whether you’re personalizing mugs, decorating tumblers, or enhancing DIY projects, this step-by-step guide will walk you through the process of using waterslide decal paper effectively.
Table of Contents
What is Waterslide Decal Paper?
Waterslide decal paper is a specialized transfer paper that allows you to print designs and transfer them onto a surface using water.
It creates a seamless, professional finish and is popular for customizing crafts, gifts, and business products.
Types of Waterslide Decal Paper
Clear Waterslide Paper – Best for light-colored surfaces, as the design is transparent.
White Waterslide Paper – Ideal for dark surfaces, as it provides a solid white background for the design.
What You Need
Before getting started, gather the following supplies:
Waterslide decal paper (clear or white, depending on your project)
Inkjet or laser printer (ensure you have the correct decal paper for your printer type)
Acrylic spray sealer (for inkjet prints)
Scissors (or cutting machine i.e. Cricut for higher budgets/small sticker business owners)
Bowl of water
Soft cloth or paper towel
A smooth, non-porous surface (ceramic, glass, plastic, metal, etc.)
Optional: Clear topcoat sealer for extra durability
Step-by-Step Guide to Using Waterslide Decal Paper
Step 1: Design & Print
Create or choose a design using graphic design software like Canva, Photoshop, or free tools like GIMP. Ensure the resolution is high (300 DPI) for a crisp finish. Also save the design as a PNG file for the highest resolution.
Adjust printer settings to a glossy thicker material setting. No need to mirror your design unless you’re using clear waterslide paper and applying it to the inside of a transparent object.
Print your design onto the shiny side of the waterslide decal paper. Make sure to use the correct printer settings:
For inkjet printers: Use photo quality settings.
For laser printers: Ensure you have laser-compatible waterslide paper.

Step 2: Seal the Design (For Inkjet Users)
Inkjet prints require sealing to prevent ink smearing. Follow these steps:
Place your printed sheet on a flat surface in a well-ventilated area.
Spray three light coats of acrylic sealer over the design, allowing each layer to dry for at least 10 minutes.
Let the final coat dry for at least 30 minutes before proceeding.

Step 3: Cut & Soak the Decal
Carefully cut out your design, leaving a small border around it.
Fill a bowl with room-temperature water and submerge the decal for 30-60 seconds (or until the backing begins to slide off easily).
Step 4: Apply the Decal
Position the decal on your surface while it’s still on the backing paper.
Slowly slide the backing paper out while gently pressing the decal onto the surface.
Use a soft cloth or paper towel to smooth out air bubbles and excess water, working from the center outward.
Step 5: Dry & Seal
Let the decal dry for at least 3-4 hours before handling.
For added durability, apply a clear topcoat sealer (especially for objects exposed to water, heat, or friction). Allow it to cure as per the sealer’s instructions.

Tips for Best Results
Avoid touching the adhesive side of the decal too much to prevent fingerprints or smudging.
Use warm water instead of cold for a smoother application.
If your design wrinkles, gently lift and reposition it before drying.
Let the project cure for 24 hours before exposing it to water.
Common Mistakes & How to Avoid Them
| Mistake | Solution |
|---|---|
| Ink smears | Ensure you properly seal the inkjet print with an acrylic spray. |
| Decal wrinkles | Work slowly and use a damp cloth to smooth it out. |
| Bubbles trapped | Use a squeegee or soft cloth to remove air bubbles. |
| Peeling edges | Let the decal dry completely before handling, and seal it with a clear coat. |
Frequently Asked Questions
1. Can I use a regular printer for waterslide decals?
Yes! Just ensure you use inkjet waterslide paper for inkjet printers and laser waterslide paper for laser printers.
2. Can I use waterslide decals on wood?
Yes, but it’s best to seal the wood with a clear coat before applying the decal to create a smooth surface.
3. Are waterslide decals dishwasher safe?
Not by default. However, applying a heat-resistant clear sealer can make them more durable.
4. How long do waterslide decals last?
With proper sealing, they can last months to years, depending on handling and exposure.
Final Thoughts
Waterslide decal paper is an incredible way to bring custom designs to life on various surfaces.
By following this step-by-step guide, you can create professional-looking decals for crafts, gifts, or even small business products.
Now if you’re ready to get started, browse our selection of waterslide decal paper here to get crafting!