Custom labels are a perfect way to add a personal touch to jars, bottles, gifts, and more.
Whether you’re creating party favors, organizing your pantry, or branding products for your small business, making custom labels can be simple and fun.
With the right materials and a little creativity, you can achieve professional-quality results from the comfort of your home.
In this guide, we’ll walk you through the steps to make stunning custom labels using Royal Elements’ printable vinyl, laminating sheets, and even waterslide decal paper.

Materials Needed
Here’s what you’ll need to get started:
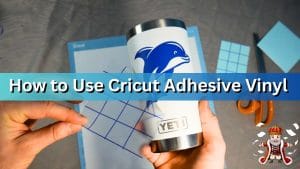
Printable vinyl (recommended for durable, waterproof labels)
Laminating sheets (optional, for added protection and a glossy finish)
Waterslide decal paper (great for intricate designs on smooth surfaces)
Printer (inkjet or laser, depending on the material)
Cutting tools:
Cricut Explore Air 2 (for precise cuts)
Scissors (for DIY enthusiasts)
Design software (e.g., Canva, Adobe Illustrator, or free online tools)
Ruler or measuring tape (to size your labels correctly)
Step-by-Step Guide to Making Custom Labels
Follow these simple steps to create custom labels:
1. Design Your Label
Use design software like Canva or Adobe Illustrator to create your label design.
Choose colors, fonts, and images that match your project’s theme.
Add measurements to ensure your label fits the surface perfectly.
2. Print Your Design
Load Royal Elements printable vinyl or waterslide decal paper into your printer.
Adjust your printer settings:
Select “Photo” or “Best” quality.
Choose the correct paper type (e.g., glossy or vinyl).
3. Cut Your Labels
If using a Cricut Explore Air 2:
Upload your design to the Cricut Design Space.
Adjust settings for vinyl or sticker paper.
Let the machine do the cutting.
For scissors:
Cut carefully along the edges of your design.
4. Laminate (Optional)
Apply a laminating sheet over the printed design for extra durability and a glossy finish.
Smooth out air bubbles with a ruler or scraper.
5. Apply Your Label
Peel off the backing and stick your label onto a clean, dry surface.
For waterslide decals:
Soak the decal in water for 30 seconds.
Slide it onto the surface and smooth it out gently.
Comparison of Materials for Custom Labels
| Material | Best Use Cases | Pros | Cons |
|---|---|---|---|
| Printable Vinyl | Jars, bottles, outdoor labels | Durable, waterproof, versatile | Requires careful cutting and alignment |
| Sticker Paper | Gifts, planners, indoor projects | Easy to use, budget-friendly | Not waterproof unless laminated |
| Waterslide Decal Paper | Smooth surfaces like glass, wood | Professional look, intricate designs | Requires soaking and delicate handling |
| Laminating Sheets | Any labels needing extra protection | Enhances durability, glossy finish | Adds an extra step |
Design Tips for Stunning Labels
Use High-Quality Images: Ensure your graphics are at least 300 DPI for sharp prints.
Pick Bold Fonts: Make text readable from a distance.
Add Borders: Borders can help define the edges of your label.
Keep It Simple: Avoid overcrowding your design with too many elements.
Use Templates: Free templates online can save time and inspire creativity.
Quick Reference for Label Making Steps
| Step | Action |
| 1. Design | Create your label design in software. |
| 2. Print | Print on printable vinyl or decal paper. |
| 3. Cut | Use a Cricut machine or scissors. |
| 4. Laminate (Optional) | Apply a laminating sheet for added durability. |
| 5. Apply | Stick or slide the label onto the surface. |
Applying Labels to Different Surfaces
Glass Jars
Clean the surface with rubbing alcohol to remove oils and dust.
Apply your label smoothly to avoid air bubbles.
Plastic Bottles
Ensure the surface is dry and free from grease.
Test the adhesion on a small area before applying the full label.
Gift Wrapping
Stick the label directly onto gift paper or boxes for a polished look.
Laminated labels work well for high-gloss finishes.
Why Choose Royal Elements?
Royal Elements offers premium printable vinyl, laminating sheets, and waterslide decal paper designed to work seamlessly with inkjet and laser printers.
Our products make it easy to create durable, professional-quality labels for any occasion.
Visit our shop page to explore our full range of products, or check out our YouTube channel for step-by-step tutorials.
Conclusion
Making custom labels for jars, bottles, and gifts is an enjoyable and rewarding DIY project.
With the help of Royal Elements products, you can create stunning designs that stand out, whether for personal use or business branding.
Start your label-making journey today and explore our range of materials to bring your creative ideas to life!
Shop Now or Browse Printable Vinyl for your next project!