Laminating your own DIY printed stickers is an easy and affordable way to protect your designs from wear and tear.
Whether you’re creating stickers for your business or personal use, laminating sheets can help ensure that your designs stay vibrant and long-lasting.
With a few simple steps, you can create professional-looking, waterproof stickers that are ready to use.
To get started, you’ll need a few basic supplies.
Royal Elements provides laminating sheets in 20 pack and 100 pack quantities
You’ll also need scissors and your printed stickers.
Once you have your supplies ready, you can begin the process of laminating your stickers.
By following a few simple steps, you can create high-quality laminated stickers that are both durable and attractive.
Table of Contents
Understanding Lamination Basics
Lamination is a process of applying a thin layer of plastic film onto a surface to protect it from damage, moisture, and fading.
Laminating sheets are used to create a protective barrier around printed stickers, making them more durable and long-lasting.
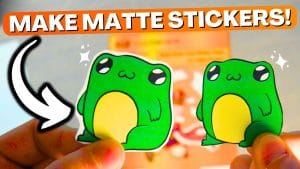
There are different types of laminating sheets available, including glossy, matte, clear & even holographic.
Glossy sheets are shiny and reflective, while matte sheets have a non-glossy finish. Clear sheets are transparent and do not change the appearance of the printed sticker.
There are also double-sided and single-sided lamination sheets available.
Double-side is mainly for documents and will usually be used with a laminating machine, however single-sided is ideal for creating custom stickers.
Before laminating, it is important to ensure that the printed stickers are clean and free from any dust or debris.
This will help to prevent any imperfections or air bubbles from forming during the lamination process.
To laminate a printed sticker, simply place the sticker onto the laminating sheet and carefully align it.
Then, peel off the backing paper from the laminating sheet and slowly press it onto the sticker, smoothing out any air bubbles as you go with your hands or a squeegee.

Choosing the Right Materials
When it comes to laminating your own DIY printed stickers, choosing the right materials is crucial to ensure the longevity and durability of your stickers.
The two main materials you’ll need are printable vinyl/sticker paper and laminating sheets. Here are some tips on selecting the right materials for your project.
Selecting Printable Sticker Paper
There are several types of sticker paper available on the market, each with their own unique properties. Here are some factors to consider when selecting sticker paper:
Adhesive: Make sure the sticker paper has a strong adhesive that will stick well to your chosen surface.
Some sticker papers have a removable adhesive, which may be useful if you want to remove the sticker without leaving any residue.
Finish: Sticker paper is available in a variety of finishes, including glossy, matte, and clear.
Consider the look you want to achieve and choose a finish that will complement your design.
Thickness: Thicker sticker paper will be more durable and less likely to tear or wrinkle.
However, thicker paper may also be more difficult to cut and may not work well with certain printers.
Material: Many varieties are on the market including printable vinyl, printable sticker paper, and waterslide decal paper to name a few.
Printable vinyl is the most durable and long lasting material and is sometimes waterproof immediately after printing, like our Royal Elements printable vinyl available on Amazon.
Printable sticker paper is made of paper and is best suited for indoor use.
Waterslide decal paper is similar but requires it to be soaked in water to release the sticker from the liner and activate the adhesive.

Choosing Laminating Sheets
Laminating sheets are available in a variety of sizes and thicknesses.
Here are some factors to consider when selecting laminating sheets:
Size: Make sure the laminating sheets are the appropriate size for your stickers.
You may need to trim the laminating sheets to fit your stickers.
It is ideal to choose 9” x 12” laminating sheets to cover a full page of 8.5” x 11” printed stickers.
Thickness: Thicker laminating sheets will provide more protection for your stickers, but may also make them more difficult to cut.
It is best to choose a thin but sturdy and flexible PVC laminate material for optimal protection.
Adhesive: Some laminating sheets have a self-adhesive backing, while others require a laminating machine to apply the adhesive.
Make sure you choose the appropriate type of laminating sheet for your needs.
By selecting the right sticker paper and laminating sheets, you can ensure that your DIY printed stickers will look great and last for a long time.
Designing Your Stickers
When it comes to designing your own DIY stickers, there are a few things that you need to keep in mind in order to ensure that your final product looks as good as possible.
Here are some tips for designing your own stickers:
Using Design Software
First and foremost, you will need to use some kind of design software in order to create your sticker design.
There are many different options out there, including Adobe Photoshop, Illustrator, Inkscape and Cricut.
When designing your sticker, it is important to keep in mind the final size that you want your sticker to be.
This will help you to ensure that your design is crisp and clear when it is printed out.
Printing Your Stickers
Once you have designed your sticker, it is time to print it out.
When printing your stickers, it is important to use high-quality paper and ink in order to ensure that your stickers look as good as possible.
Before printing your stickers, you will also need to make sure that your printer is set up correctly.
This may involve adjusting the printer settings or using a specific type of paper.

How To Laminate Stickers With Self-Adhesive Sheets
Before laminating your stickers, make sure that they are printed and cut to the desired size and shape.
Also check that the stickers are clean and free from any dirt or debris.
This can be done by wiping them down with a clean, dry cloth.
Once the stickers are ready, the laminating sheets can be prepared.
These sheets are available in various sizes and thicknesses, so it is important to choose the right one for your stickers.
Generally we recommend thicker crystal clear PVC laminate sheets sized 9″ x 12″ like our Royal Elements laminating sheets that we offer on our store page.
The laminating sheets should be cut to the same size as the stickers, with an additional margin of about 1/8 inch around the edges.
Below we talk about how to laminate using laminating pouches and a thermal laminator.
Instructions for Using a Laminating Machine
To begin laminating the stickers, the laminating machine should be turned on and allowed to warm up for a few minutes.
The laminating sheets should be placed in the machine, with the sticky side facing down.
The stickers should then be placed on top of the laminating sheet, with the printed side facing up.
Once the stickers are in place, the laminating machine should be closed and the stickers should be fed through the machine.
Make sure that the stickers are fed through the machine straight and evenly, to ensure that they are properly laminated.
Once the stickers have been fed through the machine, they should be allowed to cool for a few minutes.
After this, the laminated stickers can be cut to size and shape, using a pair of scissors or a craft knife.
Trimming Your Stickers With Scissors
After laminating your stickers, the next step is trimming them to the desired size and shape.
You can use a pair of scissors or a paper cutter to trim the excess laminate around the edges of your stickers.
Make sure to leave a small border around the sticker to prevent the laminate from peeling off.
If you want to create custom-shaped stickers, you can use a craft knife or a die-cutting machine.
Place your laminated sticker on a cutting mat, and use the craft knife to carefully cut around the edges of your design.
Alternatively, you can use a die-cutting machine to cut out your stickers in various shapes and sizes.

Finishing Touches
Once you have trimmed your stickers, you can add some finishing touches to make them look even more professional. Here are some tips:
Round the corners: Use scissors to round the corners of your stickers for a more polished look.
Add a border: Use a fine-tip marker or pen to add a border around your stickers. This will make them stand out and give them a more finished appearance.
Apply a gloss finish: If you want your stickers to have a shiny, glossy finish, you can apply a clear gloss spray or varnish over the top of the laminate.
Overall, cutting and finishing your DIY laminated stickers is a simple process that can be done with basic tools and materials.
With a little bit of creativity and attention to detail, you can create professional-looking stickers that are sure to impress.
Be sure to check out other posts on our blog to learn more about creator custom stickers and more!