
If you’ve just purchased a Cricut machine, one of the first things you’ll need to learn is how to use Cricut Design Space.
This software is the heart of Cricut crafting, allowing you to design projects, upload images, and send them to your machine for cutting, drawing, or printing.
In this beginner-friendly guide, we’ll walk through everything you need to know to get started with Cricut Design Space.
Table of Contents
What Is Cricut Design Space?
Cricut Design Space is the free software provided by Cricut that lets you create and customize designs for use with your Cricut cutting machine. Inside the program, you can:
Start new projects from scratch.
Work with shapes, text, and images.
Upload your own artwork or graphics.
Access Cricut’s library of fonts, templates, and ready-made projects.
Send your finished design to your Cricut for cutting, writing, or Print Then Cut.
It’s available for both desktop and mobile, but the desktop version offers more flexibility and is the best choice for beginners.

Getting Started: The Cricut Design Space Dashboard
When you first open Cricut Design Space, you’ll see two main areas:
Home Tab – where Cricut highlights ready-made projects, inspiration, and featured fonts.
Canvas – your main workspace, where you’ll create, edit, and arrange designs before sending them to your machine.
Think of the Canvas as your blank digital mat—it’s where all the creative work happens.

Creating a New Project
Starting a new project in Design Space is simple:
Click “New Project” from the dashboard.
Add shapes (square, circle, heart) to practice resizing, rotating, and layering.
Explore the editing toolbar for functions like “Duplicate,” “Align,” and “Flip.”
This is the best way to get comfortable with the workspace.
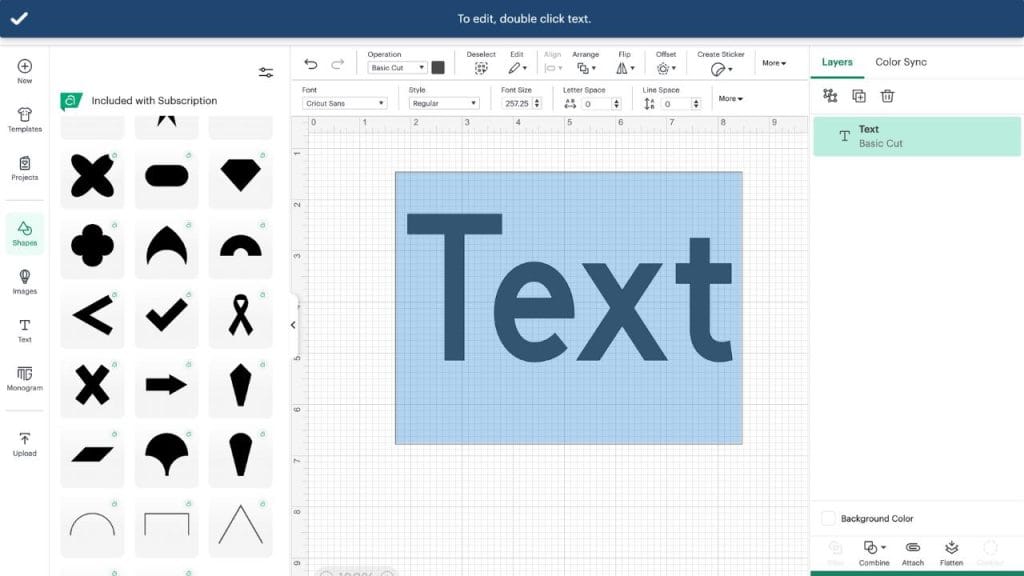
Adding and Customizing Text
Text is one of the most common features beginners use in Cricut Design Space. You can:
Select “Text” from the left-hand menu.
Type out your word or phrase.
Change fonts (system fonts on your computer or Cricut’s paid fonts).
Adjust letter spacing, line spacing, and even curve your text.
Tip: Use bold, simple fonts for cutting vinyl or sticker paper, and experiment with thinner fonts when drawing with Cricut pens.

Uploading Images and Artwork
One of the most powerful features of Cricut Design Space is the ability to upload your own graphics.
Steps:
Click “Upload” from the left menu.
Choose an image file (PNG or JPG recommended).
Use the background remover to clean up your design.
Save the image as either a Cut File or Print Then Cut File.
This is how you can turn clipart, logos, or your own artwork into Cricut-ready designs.

Understanding the Layers Panel
The Layers Panel in Cricut Design Space works like layers in Photoshop or Canva. Each shape, text box, or uploaded file appears here.
With the Layers Panel, you can:
Group or ungroup elements.
Attach items so they cut together.
Flatten multiple layers for Print Then Cut.
Hide or delete layers you don’t need.
Mastering layers is essential for building complex designs.

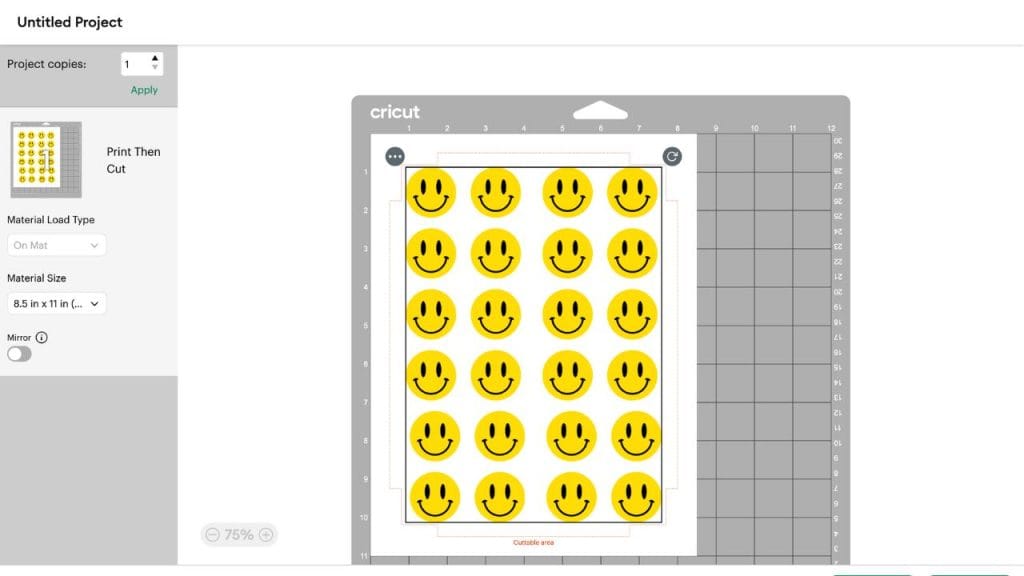
Print Then Cut Feature
Print Then Cut is perfect for creating stickers, labels, or detailed graphics. Here’s how it works:
Upload or design your image.
Flatten all layers into one.
Choose Print Then Cut from the “Operation” dropdown.
Cricut adds registration marks, which allow the machine to align your cuts perfectly.
If you’re making printable vinyl stickers, this is the tool you’ll use most often.
Sending Your Design to Cricut
Once your design is ready:
Click “Make It.”
Preview your design on Cricut mats.
Adjust settings like “Mirror” for heat transfer vinyl.
Select your material settings (vinyl, cardstock, sticker paper).
Load your mat and let the Cricut do the work.

Tips for Beginners
Start with simple shapes and text before moving to complex uploads.
Always check the material setting before cutting—wrong settings can waste vinyl.
If making stickers, use laminate sheets to protect your prints from water and scratches.
Keep practice projects small until you’re comfortable with the workflow.
Final Thoughts
Cricut Design Space might feel overwhelming at first, but once you get familiar with the dashboard, text tools, uploads, and layers, you’ll have endless possibilities for crafting.
Whether you want to make stickers, vinyl decals, t-shirts, or custom labels, this software is the gateway to bringing your designs to life.
Check out our shop page for adhesive vinyl, premium printable sticker paper and more!


