Printing stickers at home with an inkjet printer is a fun and cost-effective way to personalize your projects.
Whether you’re creating custom stickers for your planner, crafting unique designs for a small business, or making DIY gifts, using the right materials and techniques ensures professional-quality results.
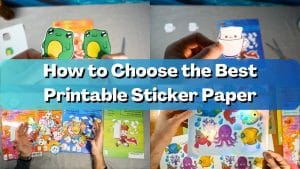
In this guide, we’ll cover the types of printable sticker paper, best practices, and step-by-step instructions to help you succeed.
What You Need to Get Started
Inkjet Printer: Ensure your printer is compatible with the sticker paper you plan to use.
Printable Sticker Paper:
Matte Printable Sticker Paper: Perfect for subtle, non-reflective designs.
Glossy Printable Sticker Paper: Ideal for vibrant, shiny finishes.
Clear Printable Vinyl: Great for transparent designs.
Design Software: Programs like Canva, Adobe Illustrator, or even Microsoft Word work well.
Laminating Sheets (Optional): Protect stickers from water and wear.
Cutting Tools: Scissors, craft knives, or cutting machines like Cricut or Silhouette.

Step-by-Step Guide to Printing Stickers
Step 1: Design Your Stickers
Choose your design software.
Create a canvas matching the dimensions of your sticker paper (typically 8.5” x 11”).
Import or create designs and arrange them to maximize space.
Add cut lines if you plan to use a cutting machine.
Step 2: Choose the Right Sticker Paper
Matte: Suitable for writing or low-glare finishes.
Glossy: Provides a professional sheen, great for decorative stickers.
Clear Vinyl: Best for glass surfaces or layering designs.
Holographic vinyl: Great for eye-catching designs giving a “rainbow effect.”
Step 3: Prepare Your Printer
Adjust the printer settings for the best results:
Paper Type: Allow auto select or choose paper type according to finish of sticker paper (i.e. “glossy photo paper” for glossy printable sticker paper).
Quality: Set to “High” or “Best.”
Load the printable sticker paper into the tray. Ensure it’s facing the correct side for printing (check the packaging and printer info for guidance).
Step 4: Print Your Stickers
(Optional): Test print on regular paper to verify alignment.
Once satisfied, print on your sticker paper.
Allow the ink to dry completely before handling to avoid smudges (~5 minutes).
Step 5: Laminate Your Stickers (Optional)
If you want waterproof or durable stickers, apply a laminating sheet over the printed stickers.
Smooth out any air bubbles using a squeegee or credit card.
Step 6: Cut Out Your Stickers
Use scissors for simple shapes.
Opt for a craft knife for detailed designs.
Use a cutting machine for precise and intricate cuts. Make sure your design software includes registration marks if using this method.
Step 7: Peel and Stick
Carefully peel off the backing paper and apply your sticker to your desired surface. Use a squeegee/old credit card to smooth out bubbles if needed.
Comparison Chart: Types of Printable Sticker Paper
| Sticker Paper Type | Best For | Finish | Durability |
|---|---|---|---|
| Matte | Writing, planners | Non-reflective | Moderate |
| Glossy | Decorative stickers | Shiny | High |
| Clear Vinyl | Glass surfaces, layering | Transparent | Waterproof |
| Holographic Vinyl | Bright, rainbow designs | Holographic | Waterproof |
Best Practices for Sticker Printing
Use Pigment-Based Ink: If possible, use pigment ink for better water resistance and longevity.
Avoid Over-Saturation: Too much ink can cause smudging. Adjust the saturation level in your printer settings if needed.
Test Different Papers: Experiment with various types of sticker paper to find the one that suits your needs.
Store Stickers Properly: Keep printed stickers in a cool, dry place to prevent fading or peeling.
Troubleshooting Common Issues
Ink Smearing: Ensure the ink is fully dry before handling or use a laminating sheet for added protection. We wrote a separate blog post on this topic.
Paper Jams: Verify that the sticker paper is compatible with your printer (printer settings adjusted to paper type) and loaded correctly (one sheet a time).
Faded Colors: Check printer settings and ensure you’re using high-quality ink that isn’t depleted.
Conclusion
Creating stickers with an inkjet printer is easy and rewarding when you use the right materials and follow best practices.
By choosing the correct printable sticker paper and following these step-by-step instructions, you’ll achieve professional-quality results from the comfort of your home.
Start designing and printing your custom stickers today!
Need high-quality printable sticker paper? Explore our wide selection at Royal Elements.