Holographic stickers add a vibrant, eye-catching shine to your designs, making them perfect for branding, crafting, or personalizing everyday items.
By using printable vinyl, you can create durable, waterproof, and professional-quality holographic stickers from the comfort of your home.
In this guide, we’ll walk you through the process step by step.

Table of Contents
Materials Needed
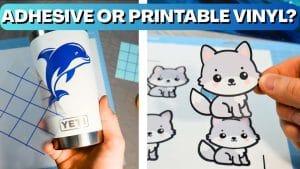
Holographic Printable Vinyl Sheets – A high-quality option like Royal Elements Printable Holographic Vinyl
Inkjet/Laser Printer – Both are compatible with printable vinyl
Laminating Sheets (Optional) – For added durability and water resistance
Cutting Machine/Scissors – Cricut or Silhuette vinyl cutter or scissors/X-Acto knife for manual cutting
Step 1: Design Your Stickers
Use software like Canva to create your sticker design.
Keep in mind that holographic vinyl will add a rainbow-like effect to white or transparent areas in your design, so plan accordingly.
Pro Tip:
Use bold colors and contrast to make your stickers pop against the holographic background.
Add a white offset around your design to create a clean border.
Step 2: Print on Holographic Vinyl
Load your holographic printable vinyl into your inkjet printer, ensuring the correct print side is facing up.
Adjust your printer settings to “Best” or “High-Quality” print mode for vibrant colors.
Print your design and let it dry completely for at least 10-15 minutes before handling.
Common Issues & Fixes:
Smudging? Ensure ink is dry before touching.
Colors look dull? Adjust your printer’s saturation settings for more vivid prints.
Step 3: Apply a Laminate Layer (Optional for Extra Durability)
Laminating your stickers helps protect against water, UV rays, and scratches.
Cut a piece of clear laminating sheet slightly larger than your printed vinyl sheet.
Peel the backing and carefully place the laminate over your printed design.
Use a squeegee or credit card to remove air bubbles and ensure a smooth finish.

Step 4: Cut Your Stickers
If using a cutting machine (Cricut or Silhouette):
Upload your design and select the correct material setting for “Printable Vinyl” or “Holographic Sticker Paper.”
Align the printed sheet on a cutting mat and load it into the machine.
Let the machine cut the stickers precisely along the edges.
If cutting manually:
Use sharp scissors or an X-Acto knife to carefully trim around your stickers.

Step 5: Enjoy Your Durable Holographic Stickers!
Now your stickers are ready to use! Apply them to water bottles, laptops, phone cases, notebooks, and more.
Thanks to the durable holographic vinyl, they will maintain their vibrant shine and resist fading over time.
Final Tips:
-Store unused holographic vinyl in a cool, dry place to prevent curling.
-If stickers will be exposed to dishwashing or outdoor elements, sealing is highly recommended.
-Experiment with different laminates (matte, glossy, UV-resistant) for unique effects!
By following these steps, you can create high-quality, durable holographic stickers that stand out and last.
Looking for the best holographic printable vinyl? Check out Royal Elements Holographic Sticker Paper for premium-quality materials!