If you’re thinking about printing your own stickers and want to spice things up – making holographic printed stickers is a great choice!
What Is A Holographic Sticker?
Holographic stickers are made from a vinyl material with a special rainbow-like metallic finish that reflects light and dazzles the eye.
A thin layer of metal is embossed over top of the vinyl to give it a “holographic” or iridescent finish similar to that of chrome.
Table of Contents
Different Holographic Patterns:
There are many varieties of holographic printable vinyl sticker sheets and rolls coming to market every year. Some of these include:
- Rainbow (also commonly called “opal” or “chrome”) pattern
- Cracked pattern
- Diamond (also called “gem” ) pattern
- Starry pattern
- Snowflake pattern
- Dazzle pattern

If you’re looking for the best printable vinyl brand to start printing & cutting – check out this article wrote on the top 25 best printable vinyl sticker paper brands.
Materials Needed To Make Holographic Stickers:
- Holographic printable vinyl
- Inkjet printer
- Cutting tool (scissors, craft knife or Cricut/Silhouette machine)
- Laminating sheets (optional)
Note: do NOT use transfer tape – this will result in the ink being ripped off of the holographic vinyl
How To Use Holographic Sticker Paper:
1. Design Your Holographic Sticker Artwork
- Use graphic design software such as Canva to create your sticker design. Alternatively you can save images from the internet and import them into a Word document.
- Make sure to size the design to fit the dimensions of your holographic vinyl sheet (8.5” x 11” in most cases).
- Consider designs that will take advantage of the holographic effect
2. Adjust Your Printer Settings
- Adjust your printer settings to premium photo paper glossy
- Set to high quality for printing
- Double check sheet size and adjust accordingly (commonly Letter size – 8.5” x 11” or A2 size – 8.27” x 11.69”)
3. Print The Design
- Load your holographic printable vinyl in one sheet at a time (to avoid jams)
- Double check all printer settings
- Print your design onto the holographic material.
4. Cut Out The Stickers
- Use scissors, a craft knife, or a cutting machine such as Cricut or Silhouette to carefully cut out the individual sticker designs.
- Try to leave a small border around each sticker.
5. Apply The Stickers
- For direct application, peel the sticker off the backing and place it on your desired surface.
- Smooth down firmly to ensure good adhesion (Tip: use a squeegee or credit card to smooth out any bubbles).
- Reminder – do NOT use transfer tape – it will rip up the ink from your beautiful new holographic sticker.
6. Laminate Your Stickers (Recommended)
- We recommend laminating your stickers to waterproof them and drastically increase their lifespan
- For extended outdoor use this is a MUST, for in-door use this is optional.
- Royal Elements laminating sheets for stickers is a good choice. Holographic laminating sheets are also an excellent option

Bonus Tips And Tricks:
- Use a holographic vinyl sticker paper material specifically made for inkjet or laser printers. Check product packaging for these details.
- Experiment with different designs to take full advantage of the holographic effect and consider increasing the contrast and brightness to make your stickers really pop.
- Apply a clear acrylic coat (i.e. Mod Podge or Krylon fixative spray) or laminate over the stickers for added durability.
- Click here to read about the top 7 sprays we recommend for sealing your stickers.
- Store unused holographic vinyl sticker paper in a cool, dry place to prevent damage.
- When laminating – add an extra border to overlap the sticker so liquid does not seep in at the seams.

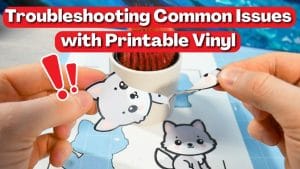
Can Cricut Read Holographic Cut Lines?
This is a common issue for holographic and glossy printable vinyl.
With reflective material, Cricut has trouble reading the cut lines because the material reflects a lot of light, causing the machine to get confused (even after several reading passes over the cut lines).
The easiest solution is to place matte tape over all the cut lines before using the Print Then Cut feature.
If the issue persists, take notes of where your Cricut machine misreads the cut lines, then either place another line of matte tape over the cut lines or smooth them down further with a squeegee or credit card.
In a “worst case scenario” you may have to reprint your Print Then Cut files, then redo the matte tape over each cut line, making sure to smooth out each piece of tape and avoid overlapping tape pieces.
How Long Do Holographic Stickers Last?
Depending on the material and ink used, holographic stickers can last over 1 year outdoors.
However with a laminating sheet placed on top, the lifespan can be drastically increased to up to 5 years if done correctly.
This all depends on the laminate’s UV-resistance, material, thickness, and how much overlap is used around the border of the sticker.
Click here to read about the top 3 ways to seal and protect your stickers.
Common reasons for printable vinyl stickers fading over time are due to sunlight and rain, so choosing your materials wisely and paying attention to detail when printing and laminating will go a long way.
Conclusion:
Creating your own holographic stickers is both fun and rewarding.
If done correctly they will turn out beautifully and will have excellent longevity.
To learn more about how to use printable vinyl check out this in-depth article we posted on the topic.
And if you’re in the market to browse and purchase printable vinyl sticker paper – check out our shop page for more details!
Happy crafting!
Michael from Royal Elements