
Creating your own stickers from AI-generated artwork is surprisingly easy and fun—and it can even become a profitable hobby or business.
Whether you’re customizing your journal or launching an Etsy shop, this guide walks you through how to print AI stickers using high-quality printable vinyl sticker paper.
You’ll get vibrant, waterproof, and long-lasting results every time.
Table of Contents
Step 1: Generate Your AI Sticker Art
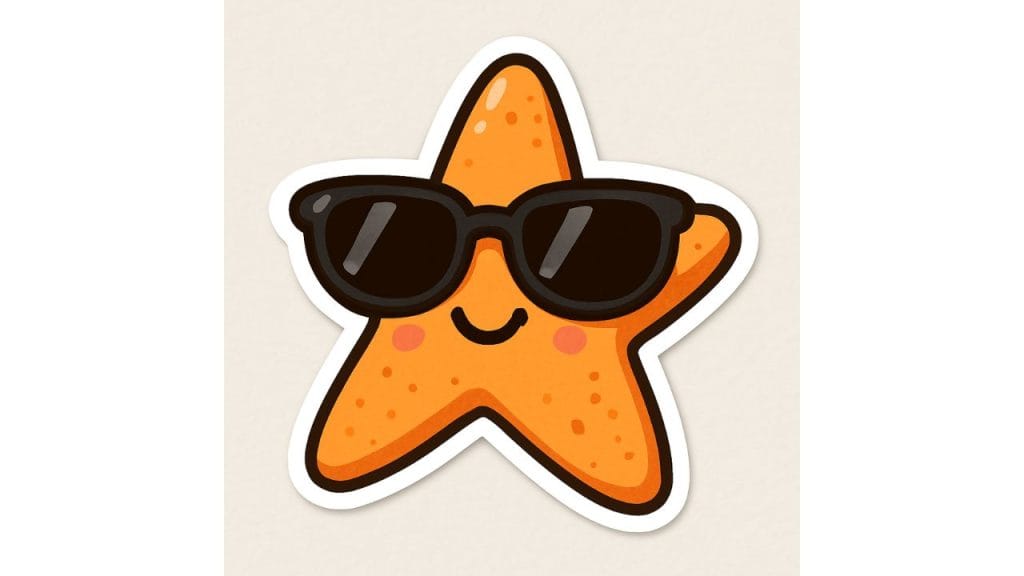
To start, you’ll need digital artwork to turn into stickers. AI tools like Midjourney, DALL·E, Bing Image Creator, or Stable Diffusion allow you to create original images simply by typing prompts.
Try ideas like “cute cat in a teacup,” “vintage camper with florals,” or anything you can imagine.
Once you’ve got a design you love, upscale it for clarity—especially if the resolution is low.
Some platforms have a built-in upscale feature, or you can use free online tools.
Save your images as PNGs, especially if you want transparent backgrounds for die-cut style stickers.
Step 2: Prepare Your Sticker Sheet
After creating your designs, arrange them into a sticker sheet using free tools like Canva, GIMP, or Cricut Design Space. Start with an 8.5″ x 11″ canvas (standard printer paper size).
You can fit several stickers per sheet—just leave space between them for cutting.
Design each sticker at your desired print size and ensure the image resolution is 300 DPI for best quality.
Add borders or cut lines if using a cutting machine later.
Once arranged, export your design as a PDF or PNG.
These formats preserve quality and sizing.
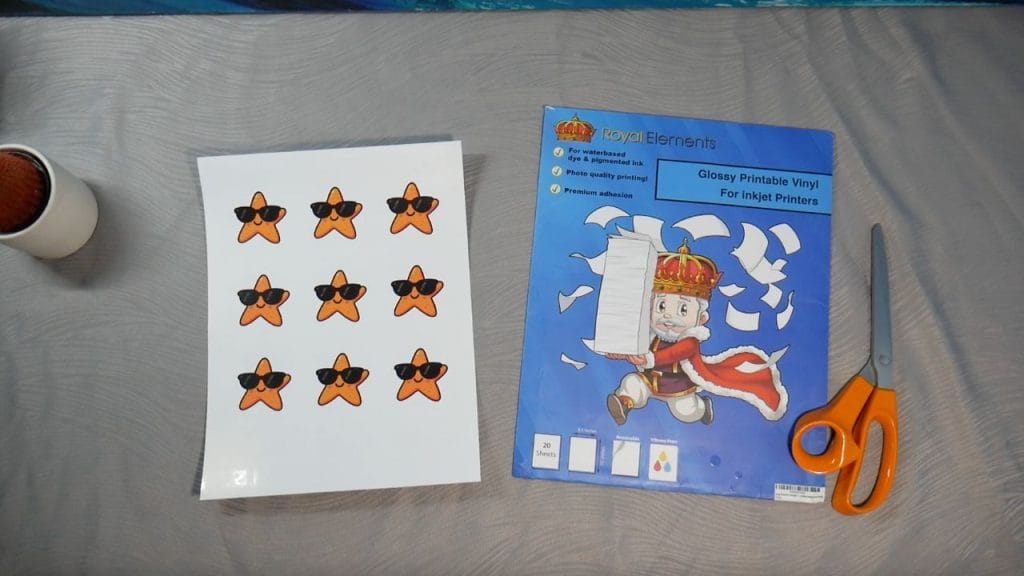
Step 3: Choose Your Printable Vinyl
There are a few different finishes available when it comes to printable vinyl:
Glossy Vinyl creates shiny, vibrant stickers—perfect for laptops, notebooks, and colorful designs. It gives your prints a professional polish.
Matte Vinyl has a smooth, non-reflective finish that’s ultra durable. It’s ideal for stickers exposed to sunlight or handled often.
You can also explore Clear or Holographic Vinyl for unique effects, great for layering or adding eye-catching shine.
Look for vinyl that works with both inkjet and laser printers and includes strong adhesive backing. Quality materials make all the difference.
Step 4: Print with the Right Settings
Now it’s time to bring your designs to life. Load your printable vinyl into the printer with the printable side facing correctly (usually the whiter or shinier side).
In your print settings:
Set your printer to Best Quality or High mode.
Choose “Glossy Photo Paper” or a similar specialty setting.
Let printed sheets dry for 5–10 minutes to avoid smudging.
Popular printer models like the Epson EcoTank, Canon Pixma, or HP DeskJet/LaserJet work exceptionally well with most vinyl sheets.

Step 5: Cut Out Your Stickers
You can cut your stickers by hand or use a cutting machine like a Cricut or Silhouette:
Cutting by Hand: Use precision scissors to carefully cut around your designs. Leave a small border for a clean look, or trim tightly for a die-cut effect.
Using a Cutting Machine: Upload your design to Cricut Design Space or Silhouette Studio. Use the Print-Then-Cut feature to automatically cut around each sticker. Don’t forget to include registration marks and set the correct material thickness.
Step 6: (Optional) Seal for Protection
If your stickers will be exposed to water or heavy handling, sealing them will make them last even longer.
Laminating Sheets: Apply a clear laminating sheet over your printed page before cutting. This adds a glossy, waterproof layer that protects from scratches and fading.
Spray Sealants: Clear acrylic sprays can also seal stickers. Apply 1–2 light coats in a ventilated area and let dry completely.
Sealing is especially useful for stickers going on water bottles, tumblers, or outdoor surfaces.
Step 7: Use or Sell Your Stickers
Time to enjoy your creations!
For Personal Use: Decorate your journals, laptops, water bottles, or phone cases. Stickers also make cute custom gifts for friends.
For Selling: Package your stickers into sets and sell them on Etsy, at craft fairs, or through your own website. Be sure to highlight that they’re printed on durable, waterproof vinyl for added value.
Final Tips
Store unused vinyl sheets in a cool, dry place to prevent curling.
Run test prints on plain paper to check layout and size before using vinyl.
Experiment with different finishes like clear or holographic vinyl for added flair.
Turning your AI-generated art into real-world stickers is easier than ever with printable vinyl.
You don’t need fancy tools or advanced design skills—just creativity and the right materials.
So go ahead: dream it up, print it out, and stick your art wherever inspiration strikes.
Happy crafting!


