Whether you’re a beginner or an experienced Cricut user, having a few clever tips up your sleeve can make all the difference.
Cricut machines are powerful tools, but without the right techniques, it’s easy to waste time, materials, and money.
That’s why we’ve pulled together 35 of the best Cricut hacks to help you cut cleaner, weed faster, and organize smarter.
This guide will take you through every stage of your crafting process — from setting up your workspace to tackling advanced vinyl projects.
Table of Contents
Workspace Prep Hacks
1. Keep a lint roller nearby for cleaning mats.
Over time, Cricut mats collect dust, fibers, and scraps. A sticky lint roller is the fastest way to refresh your mat without damaging the adhesive surface.
2. Practice with cheap vinyl before using premium material.
Before you cut into expensive specialty vinyl, run your design on inexpensive vinyl or even scrap pieces. This way, you can perfect your settings and avoid wasting costly materials.
3. Calibrate your machine regularly.
Cricut machines can drift out of alignment after heavy use. Calibration ensures your cuts line up correctly, especially for print-then-cut projects where precision is critical.
4. Store blades in a labeled pill box.
A simple pill organizer can help you separate blades by type and sharpness. Label each compartment so you always know whether you’re grabbing a fresh blade or a well-worn one for rough materials.

Cutting Hacks
5. Use the washi tape setting for thin cuts.
When cutting intricate designs or delicate materials, selecting the washi tape setting in Cricut Design Space provides lighter pressure and more precision.
6. Warm vinyl slightly before weeding.
Cold vinyl can be stiff and difficult to weed. Warming it gently with a hair dryer or heat gun softens the adhesive, making small details easier to peel away.
7. Flip the mat upside down and peel the mat off the vinyl.
Instead of pulling vinyl up from the mat, turn the whole thing over and peel the mat away from the vinyl. This keeps the material flat and prevents curling.
8. Use painter’s tape to hold materials in place.
For thicker materials that may shift during cutting, apply painter’s tape along the edges. It secures the material without leaving residue behind.
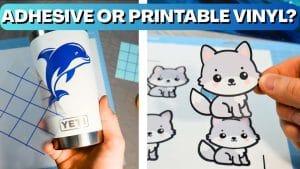
9. Mirror designs only when needed.
Remember to mirror images for heat transfer vinyl projects — but not for regular adhesive vinyl. Double-check before cutting to avoid wasted material.

Weeding Hacks
10. Use baby powder to highlight cut lines.
Sprinkle a small amount of baby powder on your vinyl to make fine cut lines more visible. Brush off the excess before weeding for a clearer view of your design.
11. Try reverse weeding for small fonts.
Instead of pulling away the excess vinyl first, apply transfer tape directly over the design. Weed the vinyl from on top of the tape, which holds small pieces in place.
12. Keep a lighted weeding station.
A desk lamp or light pad makes it much easier to see cut lines in darker vinyl. Good lighting reduces mistakes and speeds up the process.
13. Start weeding from a corner to avoid tearing.
Pick a corner and peel carefully. Starting in the middle of a design can increase the risk of tearing or stretching delicate parts.
14. Use a lint roller or sticky tape to pick up scraps.
Instead of brushing weeded bits onto the floor, press them onto a sticky lint roller or tape. This keeps your workspace clean and prevents stray vinyl pieces from sticking to projects.
Transfer Tape Hacks
15. Reuse transfer tape multiple times.
Most transfer tapes can be used several times before losing stickiness. Place used tape back on its backing paper or a sheet of plastic until you need it again.
16. Use parchment paper for layering vinyl.
Place a sheet of parchment paper between layers of vinyl to align them perfectly. The parchment prevents premature sticking while still letting you see through for positioning.
17. Cut slits in transfer tape to apply around curves.
When applying vinyl to mugs or curved surfaces, cut small slits in the tape. This lets the tape flex and prevents wrinkles or bubbles.
18. Store used transfer tape on a binder sheet.
Clear plastic binder sheets or page protectors are great for holding reusable transfer tape. It stays flat and ready for your next project.

Material Hacks
19. Try clear shelf liner as a budget transfer tape.
If you run out of transfer tape, clear shelf liner from the dollar store can be a cost-effective alternative. Test its tackiness first to ensure it won’t damage delicate vinyl.
20. Keep scraps organized by color in a binder.
Slide leftover vinyl pieces into clear binder sleeves organized by color. You’ll always know what you have and can use small scraps for accents or test cuts.
21. Save negative space for small test cuts.
Before throwing away vinyl backing, cut out small shapes in unused areas. It’s a great way to test blade settings on new materials.
22. Use washi tape or painter’s tape as cheap masking.
These tapes are perfect for temporary masking during layered vinyl projects or to block off sections when applying spray paint or etching cream.

Organization Hacks
23. Store vinyl rolls in a shoe rack.
An over-the-door shoe organizer is the perfect size for storing vinyl rolls upright. It keeps them visible and easy to grab while saving space.
24. Label mats by stickiness.
Over time, Cricut mats lose tackiness. Label them as “new,” “medium,” or “old” so you know which mat to use depending on the project.
25. Keep blades in magnetic tins.
Small magnetic tins prevent blades from getting lost or damaged. They’re inexpensive and keep your tools organized.
26. Track scrap sizes with labeled bags.
Use resealable plastic bags to sort scraps by size — for example, 2×2 inches, 4×4 inches, and so on. When you need a specific size for a project, you can find it instantly.

Advanced Hacks
27. Use adhesive vinyl as a stencil for painting projects.
Cut designs from adhesive vinyl and apply them to wood, glass, or fabric as stencils. Paint over them, then peel the vinyl away for crisp lines.
28. Try chopping mats as cutting mats.
Inexpensive plastic chopping mats from discount stores can serve as makeshift cutting mats when your Cricut mats wear out.
29. Freeze heat transfer vinyl scraps.
If you have tiny HTV scraps, place them in the freezer before cutting with scissors. The cold makes them easier to trim neatly.
30. Test cut every new material.
Before committing to a full project, run a small test cut. It saves time, prevents ruined designs, and helps you find the perfect settings.
31. Keep a hack notebook of material settings.
Write down blade depths, pressures, and speed settings for each material you use. Over time, this becomes a personalized Cricut guide that saves hours of guesswork.
32. Use masking tape hinges for alignment.
For larger vinyl projects, tape the top edge of your transfer tape in place like a hinge. This allows you to lift and adjust before committing to the final position.
33. Weed on top of a warm surface.
Place your vinyl on a warm heating pad or Cricut EasyPress (on a low setting). The heat softens adhesive and makes weeding intricate details easier.
34. Use wax paper to test design placement.
Lay wax paper over a surface before applying vinyl. You can see how the design looks and adjust placement without committing.
35. Rotate your mats to extend life.
Instead of always loading materials from the same end of the mat, flip and rotate it. This distributes wear evenly and extends the mat’s usable lifespan.

Final Thoughts
With these 35 Cricut hacks, you’ll be able to craft smarter, not harder.
From prepping your workspace and cutting more precisely to clever storage and advanced techniques, each hack is designed to make your Cricut experience easier and more enjoyable.
Keep this list handy, and don’t be afraid to experiment — some of the best tricks come from trying new approaches.
If you want to take your projects to the next level, remember that high-quality materials matter just as much as technique.
Using reliable vinyl and crafting supplies will give you the best results and help every hack on this list work even better.