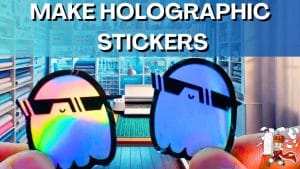
Custom stickers are a fantastic way to add a personal touch to your planner or bullet journal.
Whether you want to label craft supplies, organize pantry storage, or create thoughtful gifts, customized stickers are a fun and versatile option.
In this article, we will guide you through the process of making stickers using Cricut’s “Print then Cut” feature.
We will explain how to set up the image file in Design Space, print the stickers on an inkjet printer, and achieve the best results with your Cricut cutting machine.
Let’s get started!
Table of Contents
What is “Print Then Cut?”
One of the standout features of the Cricut machine is its “Print Then Cut” capability.
This feature allows you to cut around designs that you have printed on your home printer.
With “Print Then Cut,” you first print your images on an inkjet printer and then use your Cricut Maker or Cricut Explore to cut them out.
It’s a simple and convenient method for creating custom stickers.
Right now only the Cricut Explore & Cricut Maker can do Print then Cut.

Materials Needed
Before we dive into the process, let’s gather the materials you’ll need to make printable stickers with Cricut:
- Printable sticker paper: Look for a matte white, full-sheet printable sticker paper made for inkjet printers. Royal Elements brand sticker paper is high-quality, but if you have trouble with it going through your printer smoothly, you can try a different brand.
- Inkjet printer: Any high-quality full-color inkjet printer will work for Print Then Cut stickers. If you’re in the market for a new printer, the Canon PIXMA TS9521C is a great option, especially for paper crafters.
- Cricut Maker or Cricut Explore Air 2: Both of these Cricut machines are compatible with the Print Then Cut feature. However, please note that the Cricut Joy does not support this feature.
- Cricut Design Space: This is the software you’ll use to design and prepare your sticker files for printing and cutting.
- Sticker sheet image file: You can either create your own sticker design or find a sticker sheet file to download. There are various websites where you can find sticker designs, such as Etsy, Creative Market, and Creative Fabrica.

Designing Stickers
Now that you have your materials ready, let’s talk about designing your stickers.
You have a few options for creating your sticker designs:
- Use pre-made images: You can find images to use as stickers on websites like Etsy, Creative Market, and Creative Fabrica. For example, you can use public-domain botanical images for your stickers.
- Use a graphic design program: If you’re comfortable with graphic design software like Photoshop or Procreate, you can create your own illustrations or lettering for stickers. Procreate is especially great for drawing lettering that you can then import into Cricut Design Space.
When designing your stickers, keep in mind that the maximum printable area for Print Then Cut is 9.25″ x 6.75″.
Make sure your finished sticker sheet design fits within these dimensions.
You can design full-bleed stickers or stickers with a white border.
Cricut Design Space automatically adds a bleed by default, but you can toggle that off if you prefer.
Export your sticker design as a PNG file to preserve transparency.
Once you have your image file ready, you can upload it to Cricut Design Space.

Designing Stickers in Cricut Design Space
If you prefer to design your stickers directly in Cricut Design Space, you can do that too.
Design Space offers built-in shapes, text, and a library of graphics that you can combine to create your sticker sheet.
- To start, download and open Cricut Design Space on your computer or mobile device.
- Create a new project and add a 9.25″ x 6.75″ rectangle template to your canvas.
- This template will help you plan your design within the printable area.
- Use the basic shapes, text, and graphics from the Design Space library to create your sticker sheet design.
- Once you’re finished, select everything and use the Flatten tool to combine the shapes and text into one printable layer.
- If you want access to a wide range of designs, consider subscribing to Cricut Access.
With a Cricut Access membership, you’ll have unlimited use of Cricut’s extensive design library, which includes over 100,000+ images and 500+ fonts. Memberships start at just $7.99/month.

Printing and Cutting Your Stickers
Now that your sticker design is ready, it’s time to print and cut your stickers using the Print Then Cut feature in Cricut Design Space.
Here’s a step-by-step guide:
- Create the image file: Download a premade sticker sheet image file or design your own sticker sheet image in an app like Procreate, Illustrator, or Design Space.
- Upload the sticker image to Cricut Design Space: Open Cricut Design Space and create a new project. Click the Upload button on the main canvas and find your image file. Click Upload Image to import your sticker design. Choose the image type and save it as a Print then Cut Image. Then, insert the image into your canvas.
- Print the image: Resize the image if necessary to fit within the maximum printable area of 6.75″ x 9.25″. Load the sticker paper into your inkjet printer and click the Make it button in Cricut Design Space. Follow the prompts to send the image to your printer and adjust the printer settings for the best print quality.
- Set materials: Go back to Cricut Design Space and select your material. Choose “sticker paper” if you’re using Cricut brand sticker paper or “washi” if you’re using Avery brand sticker paper. Make sure to set the dial to Custom for Cricut Explore users.
- Load the mat: Place the printed sticker paper onto the LightGrip blue mat, aligning it with the upper left corner. Smooth the sticker paper down and load the mat into the Cricut machine by pressing the flashing arrow button.
- Cut the stickers: Once the mat is loaded, press the C button to start the cut. The Cricut machine will scan the black registration lines on the paper and begin cutting the stickers. After the cut is finished, unload the mat by pressing the flashing arrow button.
- Remove the stickers: Check that the cut has gone all the way through, especially if you want “die cut” stickers. If necessary, run the mat through a second time. When you’re done cutting, remove the mat from the machine and peel the stickers off. If you’re having trouble with the sticker sheet ripping or curling, try turning the mat upside down onto a clean work surface and peeling the mat off of the sticker sheet. This technique will help prevent the stickers from curling up.
If you’ve made “kiss cut” stickers, you can remove the outer layer of sticker paper from the cut stickers.
Then, you’ll have perfectly cut stickers attached to the backing sheet, ready to use.

Tips for Print Then Cut
Here are some important things to remember when setting up a “Print then Cut” project:
- Image Size: If you’re trying to Print then Cut an image that is too large, you’ll see a warning symbol in the Layers panel on the right-hand side of your screen. Reduce the image size to 6.75″ x 9.25″ or less and try again.
- Image Bleed: By default, Cricut Design Space adds a “bleed” to your image, which is an extra border that extends beyond the cut line. The bleed may make the printed image look blurry or have a fuzzy edge, but don’t worry, this extra border will be trimmed off in the cutting step. If you’re making stickers with a white border, you can turn off the bleed.
- Material Placement: When placing the printed sticker paper on the cutting mat, align the top edge with the grid lines on the mat. Try to ensure that the sticker paper is straight and smooth. This will help the Cricut machine read the sensor marks and make accurate cuts.
- Complete the Project in One Session: For the best results, try to complete the entire process in one session. Use the same computer and browser to access Design Space to avoid printing problems, registration errors, or cutting mistakes.

Troubleshooting Print Then Cut
Sometimes Print Then Cut projects don’t turn out as intended. Here are some troubleshooting tips and frequently asked questions:
- Cricut Sensor Marks: If your Cricut cannot read the cut sensor marks, there are a few things to check. Make sure there isn’t too much direct lighting or glare on the sensor marks. Check that the material and mat are placed correctly. Avoid using glossy, patterned, or smudged material, as these can interfere with the sensor reading.
- Calibration: If the cuts don’t match the image, your Cricut may need to be calibrated. Select the Calibrate option in the menu and print out the calibration sheet. Follow the directions to calibrate your machine for Print Then Cut.
- Cutting Pressure: If the Cricut cuts through the backing sheet, you may need to adjust the pressure settings. To create “kiss cut” stickers, decrease the cutting pressure so that the Cricut cuts through the sticker layer but leaves the backing layer intact. The “sticker paper” setting should produce a “kiss cut” for Cricut brand sticker paper. For other brands, try using less pressure or choose a different custom setting like “sticky note” or “washi.”
Conclusion
Printing and cutting your own stickers can be a fun and creative way to personalize your crafts and projects.
With Cricut Design Space’s Print Then Cut feature, you can easily turn your sticker designs into professional-looking stickers.
Just follow the step-by-step guide and keep in mind the tips and troubleshooting advice to ensure successful results.
Get creative and enjoy making your own custom stickers with Cricut!